DIY Party Decorations: Make Your Celebration Unique

Planning a party and looking to add a personal touch? DIY party decorations are a fun and creative way to make your celebration unique and memorable. With a few simple tips and tricks, you can easily craft stunning decor that will impress your guests and make your party one-of-a-kind.

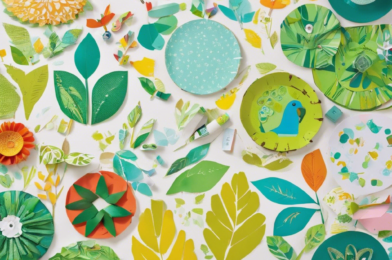
When it comes to DIY party decorations, the possibilities are endless. Whether you’re hosting a birthday bash, a holiday gathering, or a festive soiree, there are countless ideas to explore. One of the simplest ways to add a DIY touch to your party is by creating personalized bunting or garlands. All you need is some colorful paper or fabric, string, and a little creativity. Cut out your desired shapes – whether triangles, flags, or fun motifs – and string them together to form a festive bunting that can be hung across walls, above tables, or even outdoors. Garlands made from tissue paper pom-poms or origami creations are also a charming and cost-effective way to decorate.

Another easy DIY decoration idea is to create centerpieces for your tables. This could be as simple as arranging flowers or greenery from your garden into Mason jars or recycled bottles. For a more personalized touch, add candles, fairy lights, or even small keepsakes that reflect your party theme. If you’re feeling crafty, try making your own table runners or place mats using fabrics that complement your color scheme. It’s a great way to add texture and visual interest to your tablescape.

The fun part about DIY decorations is that you can customize every detail, from the invitations to the favors. For instance, create personalized party invitations by using online design tools or your own craft supplies. This way, you can set the tone for your celebration and give guests a glimpse of what to expect. And when it comes to party favors, get creative by making your own treats or small gifts that align with your party theme.

Don’t be afraid to think outside the box and incorporate unique elements into your decor. For a whimsical touch, hang paper lanterns or string lights from the ceiling, or create a fun backdrop for photos using streamers and balloons. If you’re feeling adventurous, try making a piñata or a life-size cutout for guests to pose with. These interactive decorations will not only impress your guests but also create lasting memories.

Involving your friends and family in the process of making DIY party decorations can also be a fun bonding experience. Host a craft night and enlist the help of your loved ones to assemble favors, create signage, or put the final touches on your decor. Not only will this lighten your workload, but it will also create a sense of community and make your party even more special.

When it comes to DIY-ing your party decorations, the key is to start early, plan ahead, and get creative. Draw inspiration from online resources, craft stores, or even nature to create decorations that reflect your unique style and theme. Remember, it’s the little details that make a big impact, so have fun and don’t be afraid to experiment. With a bit of effort and imagination, your party is sure to be a memorable and unique celebration.

So, there you have it! A few simple ideas to get you started on crafting your own party decorations. Whether you’re hosting a birthday bash or a festive gathering, DIY decorations add a personalized touch that will leave a lasting impression on your guests. Happy planning, and most importantly, happy crafting!

Crafting on a Budget: Dollar Store DIY Ideas

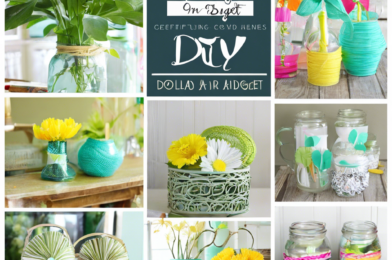
Crafting is a fun and creative hobby, but it can often be expensive. The good news is that there are plenty of budget-friendly options available at your local dollar store! With a little creativity and some DIY know-how, you can transform everyday items into something special. So, get ready to stretch your creative muscles and discover some fantastic crafting ideas that won’t break the bank.

Dollar stores offer a treasure trove of affordable supplies and inspiration for crafters. Whether you’re a seasoned crafter or a beginner, there’s something for everyone. One of the greatest things about crafting with dollar store finds is the low cost; you can experiment with new techniques and materials without breaking the bank. It’s the ultimate creative playground, offering endless possibilities for customization and personalization.

A simple walk through the dollar store aisles can spark inspiration for your next project. Keep an open mind and look beyond the items’ intended purposes. For example, those plastic flowers meant for decoration can become a fun hair accessory with a bit of hot glue and a clip. With a touch of imagination, the ordinary can become extraordinary.

Candle-making is an enjoyable and straightforward craft to try. The dollar store offers a variety of candles and wax melts, as well as decorative items that can be repurposed as candle containers. Get creative by melting down the wax and adding your own unique touches, such as essential oils for fragrance and dried flowers or herbs for decoration. The result is a personalized candle that rivals any boutique find.

The art of decoupage allows you to revamp everyday objects. Mod Podge, a decoupage staple, is available at dollar stores, along with an array of decorative papers and stickers. Transform plain wooden boxes, trays, or plant pots into vibrant, patterned creations. Decoupage is a versatile technique, and with the right paper choices, you can create anything from a rustic, vintage look to a bold, modern design.

Dollar stores also offer a selection of art supplies, including canvases, paint, and brushes, perfect for creating your own wall art. Experiment with different painting techniques or try your hand at mixed media art by incorporating other dollar store finds, like buttons, ribbons, or fabric swatches, into your creations. The result is a one-of-a-kind piece of art that reflects your unique style and creativity.

If you’re feeling extra adventurous, try your hand at jewelry-making. Dollar stores carry a variety of beads, charms, and findings, as well as tools like pliers and wire cutters. You can also upcycle broken or outdated jewelry pieces found at thrift stores or garage sales. Create unique and personalized necklaces, bracelets, and earrings that showcase your individual style.

The crafting possibilities are endless when it comes to dollar store finds. With a bit of imagination and creativity, you can transform everyday items into functional and decorative pieces for your home or unique gifts for your loved ones. So, the next time you’re looking for a fun and budget-friendly crafting idea, head to your local dollar store and let your creativity run wild!

Crafting on a budget has never been more fun and exciting! With these DIY ideas, you can create beautiful and practical items without spending a fortune. So, get ready to unleash your creativity and transform those dollar store finds into something truly special. Happy crafting!

Introduction to Calligraphy: Adding Flair to Your Writing

The art of calligraphy, an ancient form of visual expression, is enjoying a resurgence in popularity as people seek new ways to add a personal touch to their written communication. With its intricate designs and elegant flourishes, calligraphy transforms mere words into works of art, elevating the simplest of messages into something truly special.

For those unfamiliar, calligraphy is a form of artistic writing that focuses on the visual form and design of letters and words. It involves creating beautiful, decorative lettering using a variety of writing instruments and techniques. While it may seem like a niche skill, calligraphy has a wide range of applications and can be used to create everything from wedding invitations and certificates to logo designs and typography for books and magazines.

One of the most appealing aspects of calligraphy is its versatility. With a range of calligraphy styles to choose from, there is something to suit every taste and occasion. From the classic and elegant Copperplate script, which is often used for wedding invitations and certificates, to the more modern and playful Brush lettering, perfect for adding a touch of whimsy to your designs, the possibilities are endless. There are also Blackletter and Gothic scripts, which are bold and dramatic, often used for titles and headings, and Italic script, which is simple and elegant, perfect for everyday writing and adding a touch of sophistication to your correspondence.

Calligraphy also allows for a great deal of creativity and self-expression. Artists can experiment with different inks, papers, and writing instruments to create unique and personalized effects. The angle and pressure applied to the writing instrument, as well as the speed and direction of the strokes, can all be varied to create an infinite number of visual effects.

For beginners, the world of calligraphy can seem daunting. However, with practice and patience, anyone can master the basic techniques and begin to create beautiful letterforms. There are also many online resources and beginner-friendly tools available, making it easier than ever to get started.

In this introductory series, we will explore the basics of calligraphy, including the different tools and materials needed, the various styles of lettering, and simple techniques to get you started on your calligraphy journey. So, whether you’re looking to add a touch of flair to your personal correspondence or wanting to explore a new creative outlet, stay tuned as we delve into the captivating world of calligraphy.

We will also showcase the work of established calligraphers, providing inspiration and insight into the diverse and captivating world of modern calligraphy. So, get ready to dive into the history, techniques, and applications of this beautiful art form and discover how you can add a touch of flair and elegance to your writing!

Whether you’re a beginner looking to explore a new hobby or a seasoned artist seeking to add another skill to your repertoire, calligraphy has something to offer everyone. So, why not pick up a pen and give it a try? You might just find that it’s the perfect way to add a little extra beauty and creativity to your life.

Eco-Friendly Crafting: Projects Using Recycled Materials

The world of crafting is undergoing an exciting transformation as eco-conscious creators embrace recycled materials in their projects. This innovative approach not only reduces environmental impact but also sparks creativity, as crafters find new ways to repurpose everyday items. From plastic bottles to fabric scraps, nothing is off-limits in the world of eco-friendly crafting.

One of the most popular trends in this movement is upcycling, which involves transforming discarded objects into something new and improved. For example, old jeans can be cut and sewn into stylish bags, while plastic bottles can be turned into colorful yarn for knitting or crocheting. Even something as simple as a glass jar can be upcycled into a chic vase or storage container with a bit of creativity and some decorative touches.

Those with a green thumb can also get in on the action by creating self-watering planters from recycled wine bottles or turning old pallets into vertical gardens, perfect for small spaces or apartments. There’s something for every skill level and interest in eco-friendly crafting, whether you’re a seasoned artist or a beginner looking for a fun new hobby.

Fabric scraps, in particular, have become a favorite material for eco-friendly crafters. These remnants, often discarded by garment manufacturers, are given new life as patchwork quilts, colorful rugs, or even unique accessories like hair bows and brooches. It’s a beautiful way to reduce waste and create one-of-a-kind pieces that showcase individual style.

For parents, eco-friendly crafting offers a wonderful opportunity to teach children about sustainability and creativity. Simple projects like making toys or jewelry from recycled materials can spark imagination and foster a respect for the environment from an early age. It’s a fun and educational way to spend time as a family while also doing something positive for the planet.

The internet has played a significant role in the rise of eco-friendly crafting, with platforms like Pinterest and Instagram providing endless inspiration and tutorials. Crafters can connect, share ideas, and showcase their unique creations to a global audience, inspiring others to follow suit. It’s a community that continues to grow and evolve, always coming up with new ways to make a positive impact.

Local communities are also embracing this trend, with craft groups, schools, and charities adopting eco-friendly projects. These initiatives not only bring people together but also encourage collaboration and a sense of collective responsibility for the environment. It’s heartening to see people of all ages and backgrounds getting involved and making a difference, one craft project at a time.

As the world becomes increasingly conscious of environmental issues, it’s heartening to see the crafting community leading the way in sustainability. By embracing recycled materials and eco-friendly practices, crafters are proving that it’s possible to be creative and environmentally responsible simultaneously. It’s a movement that’s not only good for the planet but also fosters creativity, community, and individual expression.

So, whether you’re an experienced crafter or just starting, why not give eco-friendly projects a try? You’ll be joining a global community of like-minded individuals who are passionate about making a difference, one recycled creation at a time. It’s a fun and rewarding way to reduce your environmental impact and unleash your creativity.

DIY Organization: Cute and Functional Storage Solutions

The world of DIY organization is an exciting realm, offering endless possibilities to create cute and functional storage solutions tailored to your unique needs and aesthetic preferences. It’s time to bid adieu to clutter and embrace a stylish and efficient space!

One of the hottest trends in DIY organization is the utilization of multipurpose furniture. Opt for a stylish ottoman with hidden storage or a sleek bench with compartments to discreetly stash away items. Not only do they provide extra seating, but they also double as clever hideaways for blankets, pillows, or seasonal items. If you’re feeling creative, revamping vintage suitcases or wooden crates as storage tables adds a unique touch to your décor while keeping your belongings neatly tucked away.

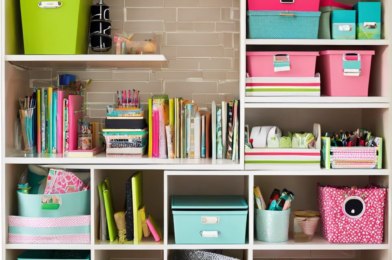
For the aesthetically inclined, displaying your possessions can be an art form. Open shelving and cute wicker baskets create an inviting and accessible storage solution, perfect for showcasing your favorite books, plants, or memorabilia. Clear jars and canisters in varying sizes are ideal for pantry organization, letting you spot your pasta, rice, or snacks easily while keeping the space tidy and Instagram-worthy.

Maximizing vertical space is a game-changer for small areas. Install floating shelves to exhibit your cherished collectibles or artwork, freeing up valuable floor real estate. Clear, stackable storage bins are a godsend for making the most of tight closet spaces. They let you see the contents at a glance and stack neatly, ensuring efficient use of every inch.

Under-the-bed storage is a classic solution for bulky items like comforters, off-season clothing, or extra shoes. Invest in slim, rolling carts that slide effortlessly under your bed, turning this often-overlooked area into a functional storage haven.

Let’s not forget about the back of doors! Over-the-door organizers with pockets or hooks are incredibly versatile, providing the perfect spot for everything from jewelry and accessories to cleaning supplies or bathroom essentials.

Labeling is the secret weapon of organization enthusiasts. A good label maker or some creative hand-lettering on chic tags can instantly elevate your DIY storage game. Labeling helps you locate items quickly and ensures everything has a designated place, making it easier to maintain an organized space.

The key to successful DIY organization is tailoring solutions to fit your lifestyle and tastes. By merging functionality with your unique style, you’ll create a space that’s not only efficient but also truly yours. So grab your tools, roll up your sleeves, and get ready to transform your surroundings into a haven of cuteness and productivity!

Fabric Crafts: No-Sew Projects Anyone Can Do

Crafting with fabric is an accessible and rewarding hobby that anyone can try. No fancy equipment or years of experience are needed – just some basic materials, a bit of creativity, and a willingness to learn. The result? Beautiful, unique creations that are both functional and fashionable. Whether you’re a total beginner or an experienced crafter looking for a new challenge, no-sew fabric projects offer an enjoyable and satisfying way to express your creativity. So, if you’re ready to explore the world of no-sew fabric crafts, let’s dive into some simple projects that will have you crafting like a pro in no time!

One of the easiest ways to start crafting with fabric is by using a simple no-sew technique involving fabric glue or a hot glue gun. This method is perfect for creating decorative items such as throw pillows, blankets, and even small accessories like headbands and bows. With a bit of strategic glue placement and some creative folding, you can create neat hems and seamless finishes that rival those achieved by sewing. The best part? No needle and thread are required! Fabric glue provides a secure hold, and with practice, your creations will look store-bought.

Another essential tool for no-sew fabric crafting is the trusty iron. Fusible web tape, a product that adheres fabric together with the heat of an iron, is a game-changer for creating clean, polished seams. This tape is perfect for projects like napkins, table runners, and even simple curtains. The tape provides a strong bond that can withstand wear and tear, and the iron ensures a precise and professional finish. This technique is also excellent for quick repairs, such as mending a torn hem or attaching a patch to conceal a hole, making it a versatile tool for any fabric crafter.

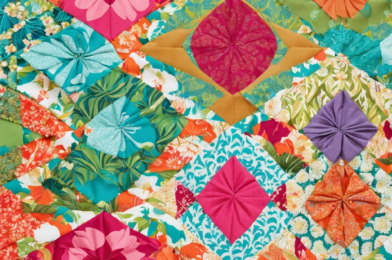
If you’re seeking a more decorative approach to no-sew crafting, consider fabric folding and manipulation techniques such as origami or fabric weaving. These methods create visual interest and texture without picking up a needle. Origami fabric crafts, for example, can be used to make decorative wall art, unique gift boxes, or even elaborate sculptures. Weaving, on the other hand, can be used to create tapestries, pillows, or even baskets with a contemporary look and a wonderful tactile quality. The possibilities are endless with these innovative techniques.

Those with a green thumb might enjoy crafting with fabric to create hanging planters or decorative pots for their houseplants. Fabric-covered plant holders add a cozy and unique touch to your indoor garden and make wonderful gifts for plant-loving friends. Simply take a regular terracotta pot and use fabric and glue to create a stunning new look. You could try an elegant neutral fabric with a textured finish or a bold print for a statement piece. Don’t forget to seal the inside of the pot to make it water-resistant!

Fabric crafting also offers a sustainable approach to creating new items by upcycling old fabrics. You can transform outdated clothing or thrifted finds into something fresh and modern. For example, turn an old shirt into a stylish tote bag with a few simple cuts and clever folding techniques. Old jeans can become a stylish denim apron, and vintage scarves can be transformed into a chic, one-of-a-kind skirt. Upcycling is a creative way to reduce waste and breathe new life into pre-loved items, giving them a second chance to shine.

No-sew fabric crafts also provide an excellent opportunity to involve children in creative projects. Simple tasks like gluing, folding, and decorating fabric offer a fun and educational way to introduce them to the world of crafting. They can make their own unique accessories, such as hair ties, bracelets, or even simple no-sew stuffed toys. These projects encourage imagination, motor skills, and a sense of accomplishment. So break out the craft box and let their creativity run wild!

For those seeking a more advanced challenge, there are numerous no-sew projects that offer a sophisticated finish. For example, creating a fabric lampshade involves carefully wrapping and gluing fabric around a lamp base, resulting in a sleek and elegant light fixture. You can also try your hand at upholstery, re-covering a chair seat or headboard with new fabric for a fresh, custom look. These projects may require a bit more precision and patience, but the stunning results will have you feeling like a true artisan.

Whether you’re a beginner or a pro, the world of no-sew fabric crafts offers an array of exciting possibilities to explore. With just a few basic tools and techniques, you can create beautiful and functional pieces that reflect your unique style. So, why not give it a try? Break out your fabric stash, grab some glue, and let your creativity flourish. Happy crafting!

The Basics of Woodworking: Simple Projects to Get Started

Woodworking is an ancient craft and a valuable skill to have in your DIY arsenal. It can be a fun and rewarding hobby, allowing you to create beautiful and functional pieces with your own two hands. For beginners, it might seem daunting, but with the right guidance and simple projects to start, you’ll be crafting like a pro in no time!

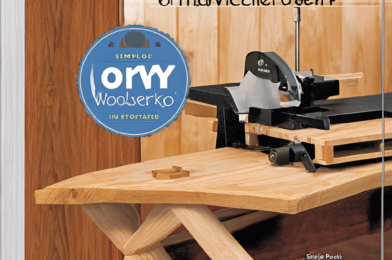
The first step is to familiarize yourself with the tools of the trade. The most basic and essential tools for woodworking include a variety of saws, such as a crosscut saw and a rip saw, a drill, a measuring tape, a level, a sander, and a hammer. Take the time to learn about the different types of wood and the specific characteristics and grains of each variety. This will help you choose the right wood for your projects and understand how to work with the grain for a smooth finish.

Once you have the basics down, it’s time to get started on some simple projects to build your skills and confidence. One of the easiest projects for beginners is creating a simple bookshelf. This will allow you to practice measuring, cutting, and assembling wood. You can start with a basic design and then get creative by adding your own unique touches, such as decorative brackets or a custom finish.

Another great beginner project is building a birdhouse. This will help you practice your woodworking skills, such as cutting and shaping wood, and you can also get creative with the design and add some fun decorative elements. It’s a great way to attract birds to your garden and add a charming touch to your outdoor space.

If you’re looking for a practical project, why not try your hand at making a wooden cutting board? This project will allow you to practice working with different types of wood and creating a smooth, finished surface. You can also experiment with different shapes and designs to make your cutting board unique.

As you gain more experience and confidence, you can start tackling more complex projects, such as building your own furniture. Start with simple pieces, such as a sturdy end table or a rustic bench, and work your way up to crafting more intricate designs. Woodworking is a fantastic way to create custom pieces that are tailored to your taste and space.

When starting out, it’s important to prioritize safety. Always wear protective gear, including safety goggles, a dust mask, and gloves, when working with wood and power tools. Take the time to learn about the safe use of each tool and never rush a project. Patience and a careful approach will ensure that your woodworking journey is enjoyable and accident-free.

The world of woodworking is vast and exciting, with endless possibilities for creating beautiful and functional pieces. Whether you want to craft furniture, home décor, or unique gifts, there are plenty of resources available to guide you on your woodworking journey. Online tutorials, woodworking magazines, and local classes or workshops can provide you with the knowledge and inspiration you need to become a master woodworker.

Remember, the key to becoming a skilled woodworker is practice, patience, and perseverance. Start with simple projects, take your time, and don’t be afraid to make mistakes – they’re all part of the learning process. With each project, your skills and confidence will grow, and soon you’ll be able to take on more complex and challenging woodworking endeavors. So, grab your tools, roll up your sleeves, and get ready to create something amazing!

Seasonal Crafts: Decorating Your Home Year-Round

The change in seasons offers a wonderful opportunity to get creative and decorate your home, bringing a touch of nature and festive cheer to your living space. With each new season comes a chance to embrace different colors, textures, and themes, keeping your home décor exciting and dynamic throughout the year. So, how can you decorate your home to celebrate the changing seasons?

Spring is a time of renewal and growth, so embrace fresh and vibrant colors. Adorn your home with pastel hues and delicate florals. Try making paper flowers or painting eggs for Easter. Summer is all about sunshine and warmth, so bring the outdoors in with natural materials and vibrant colors. Create a summer wreath with colorful flowers and greenery or make seashell decorations if you live by the ocean.

As the weather cools in autumn, warm tones and natural elements take center stage. Think crimson, amber, and rust-colored leaves. You can make garlands from dried leaves and pinecones or carve pumpkins for a cozy, rustic feel. When winter arrives, it’s time to embrace the magic of the festive season. Think snowy scenes, twinkling lights, and all things sparkly. Create handmade snowflakes and glittery ornaments or try weaving a festive wreath with pinecones and berries.

You can also decorate for the smaller, more unique seasons within the year, such as the transition months. For those in the Northern Hemisphere, this includes seasons like the colorful and festive Mardi Gras and the blooming beauty of pre-spring. Embrace the colors and symbols of these seasons to keep your home décor exciting and unique.

The key to successful seasonal decorating is to keep things simple and natural. Forage for materials outdoors, such as twigs, leaves, and pinecones, and incorporate them into your décor. This is a fun, free activity that also connects your home to the beauty of the changing seasons. Another tip is to plan ahead. Store your decorations carefully and create a calendar of themes and colors for each season to ensure a seamless transition from one season to the next.

Most importantly, have fun and get creative! Involve your family and make it a group effort. Seasonal crafts are a wonderful way to bond with your loved ones and create lasting memories. So, whether you’re a seasoned pro or a beginner, embrace the changing seasons and enjoy decorating your home year-round. With a few simple touches, you can bring the beauty of nature and the joy of the season into your living space.

Now, if you’re feeling inspired and ready to take on the task of seasonal decorating, here are some additional tips and tricks to elevate your craft game. First, don’t be afraid to think outside the box. While traditional colors and themes are charming, you can add a unique twist by incorporating unexpected elements. For example, try using non-traditional colors for a particular season or combining different textures and patterns. Surprise and delight your guests (and yourself!) with your creative interpretations of seasonal décor.

Lastly, seasonal decorating is also about capturing the essence of the season through scent and ambiance. Evoke a sense of coziness and warmth in your home by incorporating scented candles or incense. Opt for seasonal fragrances like fresh linen for spring, citrus for summer, cinnamon for autumn, and pine for winter. These subtle touches will enhance the overall atmosphere and truly embrace the magic of each season. Happy crafting, and may your home always be filled with the beauty of the changing seasons!

Pottery Without a Wheel: Easy Clay Projects for Beginners

The world of pottery is fascinating, and for beginners, it can be a fun and therapeutic hobby to take up. Working with clay offers a tactile and sensory experience like no other, and the best part is that you don’t always need a potter’s wheel to create beautiful and functional pieces.

For those just starting and wanting to try their hand at clay, there are plenty of simple projects that can be easily attempted at home or in a studio. One of the easiest and most satisfying projects for beginners is hand-building basic dishes and bowls.

Start with a slab of clay and, using simple tools like a rolling pin and slab mats, roll it out to an even thickness. From there, you can cut and shape the clay to create plates, trays, or shallow bowls. Another wonderful technique for beginners is pinch pottery.

It is an ancient method where you start with a ball of clay and literally pinch it to shape it from the inside, slowly working your way up and out to create a vessel. This technique is perfect for beginners as it requires minimal tools and offers a direct, hands-on experience with the clay.

For those who want to try something a little more challenging, coil pottery is a great technique to master. It involves rolling out long snake-like coils of clay and then building up your piece by layering and attaching these coils. This method is perfect for creating larger forms like pots, vases, or even sculptures. As a beginner, it’s important to remember that the clay you use matters. There are various types of clay to choose from, each with its own unique properties and intended use. Earthenware clay is a common choice for beginners as it is relatively inexpensive and easy to work with. However, porcelain or stoneware clay may be more suitable for those wanting to create finer, more delicate pieces.

When working with clay, the right tools can make all the difference. While you don’t need an extensive collection, investing in some basic tools like a pottery knife, ribs, and a sponge will make your clay journey much smoother. These tools will help you cut, shape, and smooth your creations, giving them a more polished look. Remember to always work in a clean space and keep your tools organized to ensure an enjoyable and frustration-free experience. Taking on a new hobby can be daunting, but with pottery, the rewards are well worth it. So, if you’re feeling inspired, sign up for a beginner’s class or invest in some basic supplies, and you’ll be well on your way to crafting your own clay masterpieces.

There are countless benefits to taking up pottery as a hobby. Firstly, it is an excellent creative outlet that allows you to express yourself and tap into your imagination. The process of working with clay is also incredibly therapeutic and can help reduce stress and anxiety. Working with your hands and focusing on shaping clay demands your full attention, acting as a form of meditation that helps calm and center your mind. In addition to the mental health benefits, pottery can also provide a sense of satisfaction and accomplishment. There is something truly special about taking a lump of clay and transforming it into a functional piece of art that you can use in your daily life or gift to someone special.

The social aspect of pottery should not be overlooked either. Joining a local pottery class or studio can connect you with like-minded people and provide a wonderful sense of community. It is a great way to meet new friends and share ideas, techniques, and a mutual passion for clay. Moreover, pottery is a skill that can easily be shared and passed on to others. Teaching someone how to work with clay and seeing their excitement as they create their first piece is incredibly rewarding. Whether it’s sharing your knowledge with a friend or passing on your love of pottery to the next generation, the ability to inspire and teach others is a beautiful part of this craft.

If you’re looking for a place to start your pottery journey, there are plenty of online resources and beginner-friendly kits available. Online platforms often offer step-by-step tutorials, from the very basics of clay preparation to more advanced techniques. They provide an excellent and affordable way to dip your toes into the world of pottery and see if it’s the right hobby for you. Beginner-friendly pottery kits are also widely available and typically include all the necessary tools and materials to get started. These kits are carefully curated to take the guesswork out of the equation, ensuring you have everything you need to begin your clay journey with confidence.

Lastly, for those eager to dive into the world of pottery, seeking out local classes or community studios can be a great option. These in-person sessions are often led by experienced potters who can provide hands-on guidance and tailored advice. Being in a studio environment also gives you access to specialized tools and equipment that you may not have at home, allowing you to fully immerse yourself in the pottery-making process. Whether you opt for online tutorials, beginner kits, or in-person classes, there are endless opportunities to explore the wonderful world of pottery without the need for a wheel. So, why not give it a try and let your creativity take shape? With a bit of practice and patience, you’ll be well on your way to crafting beautiful clay creations.

DIY Natural Beauty Products: From Face Masks to Bath Bombs

The world of DIY natural beauty products is an ever-growing trend, offering an array of benefits for those seeking a more wholesome, organic approach to their self-care routines. From nourishing face masks to fizzy bath bombs, creating your own natural remedies is not only a fun project, but it also ensures you know exactly what goes into the products you’re using. DIY beauty products allow you to cater to your unique skin and hair care needs, and with so many simple, accessible recipes available, you can explore an extensive range of natural ingredients and customize your creations to perfection.

One of the biggest advantages of crafting your own beauty treatments is the ability to avoid potentially harmful chemicals often found in store-bought products. Many commercial skincare and cosmetic items contain preservatives, synthetic fragrances, and artificial colors that may irritate sensitive skin or cause other health issues over time. By opting for natural alternatives, you can rest assured that your beauty regimen is free from these questionable additives. For instance, instead of using a toner laden with alcohol and artificial additives, you can make your own natural toner by steeping green tea, known for its anti-inflammatory properties, and adding a splash of nourishing rosewater.

Face masks are a staple in any self-care routine, and making your own allows you to customize the ingredients to target specific skin concerns. For a deep-cleansing and exfoliating mask, combine bentonite clay with apple cider vinegar and a touch of raw honey. If hydration is what your skin craves, a simple blend of mashed avocado, yogurt, and a few drops of essential oil will leave your skin feeling supple and refreshed. The options are endless, and you can tailor the recipes to suit your skin type, be it dry, oily, or a combination of both.